
BRAAI INSTALLATION:
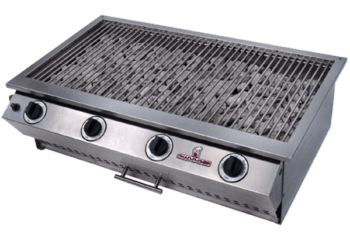
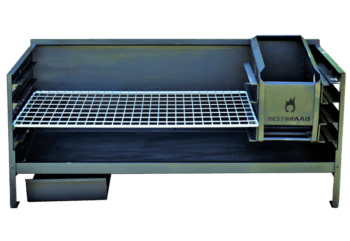

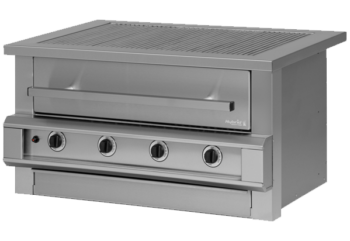


BUILDING GUIDELINES FOR INSTALLING YOUR BUILD IN BRAAI
The instructions for a braai installation is intended only as a guideline, We strongly recommended that the advice of a professional builder/installer be consulted.
Not every built-in braai is the same size. A Standard unit and a Deluxe unit aren’t identical, for a start. So treat the gaps and measurements below as a starting point, not gospel: check them against the braai you’ve actually got, or the one you’re planning to buy. Most of the guidelines here are based on our Deluxe range, since that’s the best middle ground size amongst our units. Different model? Have a look through our Built-In Braais range, or just ask us, we’ll be happy to assist.
Insure that your Built-in Braai enjoys possessive protection from the elements.
To build in a braai, preferably use baked bricks (clay bricks) around the body of the unit, as it is more resistant to heat.(Insulation material is also recommend to protect the cement between the bricks) Before you begin, keep in mind that your grid (at the lowest) is 200 mm higher than the lintels on which the braai will rest. This means the top of your lintels should not be higher than approximately 600 or 700 mm. (A)
Start with a double row of bricks, go up as high as you want your stand to be, minus 100 mm. Place lintels (2 or 3 will be enough), across the inner row of bricks, or lay a slab. Carry on up with the outer row. The width between the inner row of brick (B) should be approx. 50 mm wider than your braai. The depth (C) should be about 25 mm deeper than your braai.
The height from the top of the Bottom lintels/slab to the top of your brickwork (D) should be approx. 20 mm higher than your braai.
Ensure that the brick- or plaster work is smooth inside the braai opening and remove all loose cement or rubble. Position the braai at this time. (At This Point the entire front of the unit should be covered with plastic to prevent any cement from settling on it causing damage)
Then place a lintel across the brickwork in front of the braai gather.

You should now have a gap of 25 mm on either side of your braai, at the back thereof, and also between the top concrete lintel and that of your braai. The frame around the opening of the steel braai covers all these gaps. You should find a local insulation material that will absorb the heat, positioning it between the braai & the first row of bricks – stopping your brickwork from crumbling. It will have to be able to withstand heat of ± 500 degrees Celsius. Proceed with the insulation material for at least 1.2m up along side the flue, this will stop any cement falling down on to the gather of your braai causing damage on a later stage. Now proceed with the brickwork, either straight up (with this option the metal flue liner must extend above the brickwork ) or taper with the braai’s gather – your preference.

THE FLUE & COWL
How to calculate how much flue you will need to do a correct installation:
Take the total height from the highest point of you roof to the floor, there where your braai will stand, now subtract the height of the first lintel(A) & the total height of the braai (F) from the total height of your roof. Now you will be left with the length of flue needed to draw level with the highest point of your roof. now add 650mm to extend past your roof, in most cases this would be sufficient for your cowl to work properly.
On one of your flues, you will notice the cowl fitting (DRAWING 2). This is, of course, the topmost flue. This flue should extend at least 650mm (0.65 m) past the highest point of your roof (E) for your cowl to work properly. Take note at this stage, whether your neighbor has a higher roof or if any large trees are in the immediate vicinity. This could also cause problems for a rotating cowl. Speak to your retailer if you are worried about any of these and the possibility of using a fixed Turbo Cowl instead
When bricking up the chimney, ensure that your builder stop with the brickwork below the jenny (fig.1) of the last flue. If he does not, the skirt of the cowl might not clear the brickwork, resulting in a cowl that does not work / work properly. Squeeze the accompanying grease into the cowl-fitting and pop the ball bearing in, also put some grease on the cowl shaft just below the washer. this will prevent the cowl from making a noise when turning. Now position your cowl into the cowl-fitting. Take note that you might have to “open” the lever of the cowl-fitting so that the washer on the cowl pin will slip past the lever. Now push the lever toward the cowl pin, so that it is over the washer but not touching the cowl pin. Tie the lever to the tubing of the cowl-fitting with a cable tie or s/steel wire. This will prevent the lever from opening with time, and your cowl from blowing away.
TURBO COWLS:
If a Slip on Turbo Cowl is used, slip it over the top most flue onto the jenny and secure it with pop rivets to the flue, to prevent the wind from lifting it. Now waterproof the installation by sealing it with a water proof sealant (this might include flashing, membrane and waterproof sealant, available from your local hardware store) from the top of the brick work to just over the jenny, preventing any water leakages.
BOLT-ON TURBO COWLS

Bolt on Turbo Cowls: With this option there will be no metal flues visible above the brick chimney, one could opt for 1 x 1.2m Flue or 2.4m Flue (2 x 1.2m) One will then extend the brick chimney as high as needed (at least 650mm above the pitch or apex of your roof) and then fit the Turbo cowl. The Cowl will be bolted directly onto the brick chimney securing it in place with raw bolts or Hilti screws. Now waterproof the installation by sealing it with a water proof sealant (this might include heat resistant silicone, flashing, membrane and waterproof sealant, available from your local hardware store) to prevent any water leakages.
Still need to sort the cowl or flue? We do chimney cowls and flues in custom sizes too, in case the standard ones don’t line up with your setup.
Allow your brick work to dry for at least four to five days before lighting your first fire. now consult your recipe book for great ideas!
Whilst every care has been taken in formulating these instructions, it is intended as a general guideline only and is by no means that of a professional builder/installer. No responsibility whatsoever will attach to and/or claim lie against, the manufacturer and/or distributor of the appliance as a result of any failure to follow or understand the whole or any part of the instructions and/or as a result of incorrect information herein and/or any omission here from. We strongly recommended that the advice of a professional builder/installer be consulted.
Frequently Asked Questions
Do these measurements apply to every built-in braai?
Not exactly, braai units come in different sizes, so use these as a guideline for your specific model rather than a fixed number. Most of what’s above is based on our Deluxe range. Check your product page if you’re not sure, or ask us before you start cutting bricks.
What size should the braai opening be?
Depends on the model, our product page will have the confirmed size. From there, work in the gaps above (roughly 50mm wider, 25mm deeper than the unit itself).
How much flue do I need?
Measure from where the braai will stand up to the highest point of your roof, subtract the lintel height and the braai’s own height, then add about 650mm so it clears the roofline. The full method’s in the Flue & Cowl section above.
What steel grade should I use?
That’s really about where you live and how it’s installed. Coastal, inland, indoor, outdoor all change the answer. Our Stainless Steel Grade & Installation Guide breaks it down range by range.
Should I hire a professional installer?
Yes, ideally. This page is general guidance. It’s not a stand-in for someone actually looking at your braai and your property.


